NCT Checklist

NCT

While the reasoning behind the NCT is sound, it’s fair to say that nobody sees it that way when it’s their vehicles turn be put to the test.

But all cars must eventually go through it. And with figures indicating a + 50% failure rate year on year, and over 3,000 cars towed from centres so far in 2015 having been deemed un-roadworthy, the NCT appears to be doing its job.

Those figures are certainly daunting for anyone preparing to have their car put through its paces. And there are certain fixes that will be beyond most people (such as the number one fault Front Suspension). But there are certain easy-to-follow-steps that will give your car a better chance of passing and that won’t require a pre NCT-Check to identify.


Checks:

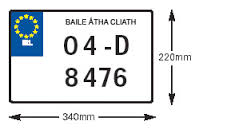
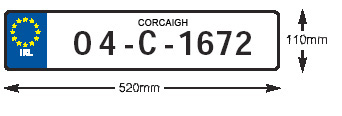
Registration Plate / Lights: Number Plates can fail for a number of reasons. If one or both are missing, insecure or not clearly visible, or if numbers or letters are missing or unreadable and an incorrect size / colour. Clearly visible marks can also be a cause for failure. Check that the lights are working properly, and are white in colour.

imgres plate1


Tyre Condition: Bad tyres are one of the three most cited causes of NCT failure since 2008. Since 2012 all new tyres sold in Europe are required to carry an EU label (see image below). The label provides consumers with important information for selecting the correct tyre. Tyres are checked for tread depth, whether it’s correctly seated on the rim, evidence of cuts or lumps as well as distortion of chaffing around the valve stem. For a full tyre guide click HERE.
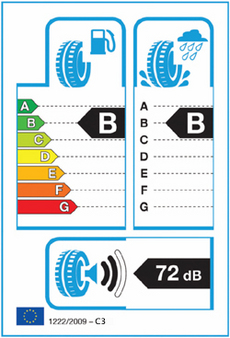
LABEL DESIGN

EU TYRE LABEL


Headamps: While the task of replacing bulbs in most modern cars is decidedly more difficult than it needs to be, there’s still no excuse for turning up at the NCT with faulty lights. Headlamp aim is one of the most common reasons for failure., Check to ensure the headlamps are securely mounted, that the glass is not cracked / missing or the lens miscoloured (i.e. not white or yellow) and that they don’t contain water / moisture (fogged up headlamps is evidence of this). Check that the dipped / main beams work simultaneously. And ensure you don’t have HID bulbs fitted in non-HID headlamps. Finally check to ensure the alignment is correct.


Indicator Lamps / Switch: Check they work, are clearly visible, mounted correctly and that the driver can be immediately aware from his seat that each indicator is functioning. Also, worth remembering that an indicator switch that does not automatically switch off is not a cause for failure.


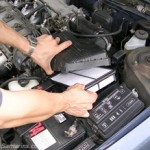
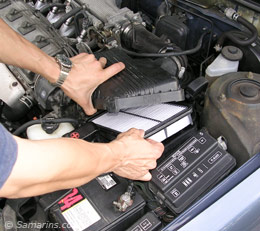
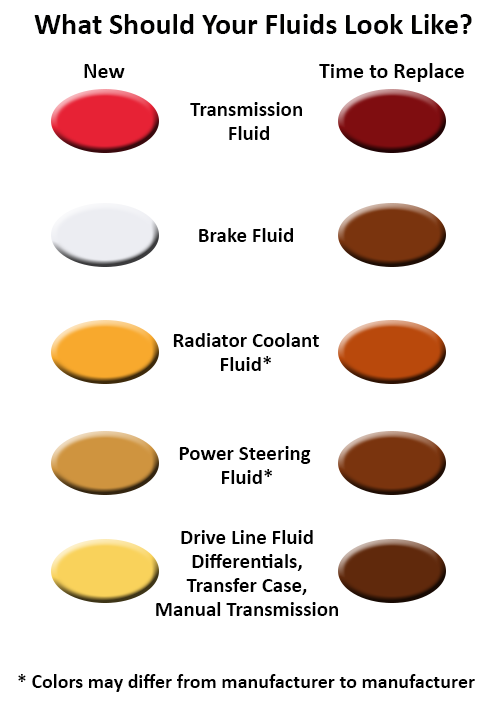
Engine Warnings & Fluid Levels: Obvious one here, but if any warning lights are flashing, well, that’s a warning and a sure fire way to fail the NCT. Always worth checking that engine oil level too. Grab that dipstick! Most of these should be labelled clearly under the bonnet and are relatively cheap to purchase.


Wipers Washers & Blades: Wiper Blades needs be clean effectively an are sufficient enough to give the drive a satisfactory view. The speed is also examined. Check the blades / arms are mounted correctly. Ensure the washer is aimed correctly.


Horn: This one’s obvious. Give it a beep! Making sufficient noise? Good to go then.


Seat Belts: Frayed, cut or repaired seat-belts will fail the test. Damaged buckles, loose of detached fixing bolts or faulty locking mechanisms will also be failed. Equally, any belt that cannot fully extend will not be passed.


Guide to changing your Air Filter

Air Filter

Stop me if you’ve heard this one before…you bring your car in for a service. Something routine enough that you just prefer your mechanic takes care of, like an oil change for example.

The mechanic then informs you that your air filter is in dire need of replacement. Sounds like a straight forward enough job that shouldn’t drive the cost up by any significant amount and won’t keep you waiting. You’re here already, so why not. Two birds, one stone right?

You go to pay and are surprised to find that the cost has doubled as a result of this small job. You say nothing, pay and vow never to just agree to that job on your car without first enquiring about the cost. Fast forward two years and you’re making the same silent vow to yourself all over again.

The thing is, replacing an air filter is amongst the most straight forward maintenance jobs you can do yourself. It requires no specialist tools, the filter itself is not an expensive item, and it is a quick fix. It is also one of the most beneficial maintenance tasks in terms of your car’s performance.


What is your Air Filter?

Air (or more specifically oxygen) is integral if an engine using petrol or diesel is to run. Without it these fuels can’t burn thus depriving the engine of the explosive force needed to power it.

This air must be cleansed before it is fed into the air intake and combustion chambers. Enter the Air Filter – it cleans the air coming into the engine whilst also preventing various forms debris from entering.


Why is it important to regularly change the Air Filter?

Filters can only handle so much. After thousands of miles these filters inevitably show the signs of wear and tear. After all, these filters don’t clean themselves.

A faulty or old filter can result in various forms of dust, debris and dirt clogging up the engine thus hampering its performance and fuel efficiency. By ignoring the Air Filter for a longer period of time you risk serious wear and tear by allowing a build-up of abrasive elements on engine components such as the bearings, cylinders and piston rings.

This in turn can hamper the Air Filters additional task of regulating the ratio of air to fuel in the engine. If the engine is prevented from getting enough clean air, the fuel mix becomes rich putting the engine under more strain.


How often should I change my Air Filter?

There is no one-size-fits-all rule. Some mechanics recommend changing the Air Filter every 3,000 miles / 4,900 km. Others would have you believe the best practice is to be vigilant for the tell-tale signs. Check it regularly yourself and replace as required.

Best practice would be to check the owner’s manual and adhere to its guidelines. In any case, it never hurts to look given how simple a procedure it is. And it could end up saving you from costly repairs further down the line.


What are the symptoms of a dirty Air Filter?

There are a number of tell-tale signs that your Air Filter is in need of replacing.

Poor Performance: A loss of engine power (acceleration etc) can sometimes be attributed to a clogged Air Filter restricting the amount of air into the engine. Jumpy acceleration is another potential indicator of a faulty Air Filter.

Poor Mileage: A decrease in fuel mileage is a common occurrence with regards to dirty filters.

Engine Noises: If the engine makes strange noises when idling (generally these noises tend to be of the spitting / spluttering variety) then you should definitely check the Air Filter.


How do I change my Air Filter?

First things first (and let’s assume you have already committed yourself to replacing the Air Filter), you’ll need to buy a replacement. Which you can do HERE.

Next, you’ll need to get under the hood to where the Air Filter is located. The Air Filter is contained in a large black plastic housing at the side of the engine. There is usually a big hose protruding from it.

Air Filter Housing

Air Filter Housing

Open this housing and remove the old filter. Now would be a good time to familiarise yourself with it. Check inside its folds for dust and other offending dirty particles.

Dirty and Clean Air Filter

Dirty and Clean Air Filter

Replace with the new Air Filter. It should fit comfortably in. Close the Housing again.

Air Filter

Replacing Air Filter

And that’s it! Simple.

Choosing the Correct Roof-Box

Choosing the right Roof-Box

Schools nearly out. There’s a grand stretch in the evening. And you’re more than likely sitting at your desk daydreaming of your impending summer holidays.

But you’re not quite there yet. There’s still the small matter of packing etc. And therein lies one of the great holiday dilemmas – how are you going to fit all that luggage in with the family? Maybe you could leave the family behind??

There is a better (i.e. safer) option – the tried and trusted roof-box! Ranging in price from hundreds of euros to thousands of euros, there’s a roof-box fit for every purpose. So choose carefully. Here are some important factors to consider when making that decision.


The Usage:

The purpose of the roof-box’s usage will determine its size, shape and the tie down system. Consider whether:

  • It will be used frequently or occasionally.
  • It will be used just during the holidays and which season (summer or winter).
  • It will be used as a portage complement or the main boot (in case your car is too small).


The Type:

Stiff and aerodynamic:

  • Made of plastic or composite, the stiff roof-box are the most popular. Wide or tight, their aerodynamic shape offers better air penetration which limits over-consumption on fuel usage.
  • It also offers you better protection against weather and theft.
  • Flaws? Setting up often requires two sets of hands, while storing it when not in use requires a lot of space.
Choosing the right Roof-Box

Guide to selecting the right Roof-Box.

Flexible and practical

  • Flexible roof-boxes are made of impermeable synthetic materials.
  • Setting up only requires one pair of hands and they don’t require much storage space when not in use.
  • However, they don’t share the aerodynamics properties of the stiffer roof-box, although the flexibility does allow you to adapt the size depending on the storage volume needed. This limits the wind loading when partially filled.
  • Although generally waterproof, the flexible roof-box tends to require some maintenance to stay this way.
  • Flaws? It’s particularly vulnerable to theft.
  • Warning: Most of the cheaper roof-boxes are often poor quality, simple rectangular boxes, offering mediocre sealing and made of thin plastic materials, without inner straps and a poor locking system.
Flexible Roof-Box

Flexible Roof-Box

The Dimensions:

Selecting the right roof-box is dependent on the luggage they will carry (as well as the Highway Code which states simply that “you must secure your load and it must not stick out dangerously”).

Similarly, you must consider the car and technical specifications of the roof-box.

Indeed, the latter only accepts a low filling mass (50 to 75kg maximum) but offers loading volume from 220 to 680 litres. Long, short or mixed, you can generally find 2 lengths (about 1m to 2.35m ) and 3 widths (about 75cm to 1.40m), depending on the manufacturer.


The Type of Fitting:

First, you must check the quality and strength of your roof-rack and its anchorages. It’s the part that will support the weight. A fixation differs according to the price range. Some are more ergonomic and patented by manufacturers, particularly for mid-range and high end products.


U-Fixation / Double thread fixation:

  • The most popular fixation. Each fixation adjusts itself according to the racks, via pre-drilled holes or by drilling the bottom of the box. So it is universal usage but not practical to set up, even more so if you have to use tools.

L-Rod / Threaded rod:

  • Composed of a thread and a locking lever. You insert the ‘L’ part under the roof-rack, adjust tightening with a thumb-wheel and lock it with the lever. It is also universal but more practical to set up.

Thule Easy – Snap & Farad Block:

  • These are evolutions of the U-Fixation. They are made of a U and a quarter rotation lock or locking lever.  Each U adjusts itself according to manufacturer’s reference. Both universal and practical in usage.


The Opening:

For stiff roof-boxes, the loading is made to the rear. The opening is either unilateral (right, left or rear) or bilateral (right and left). The latter make the loading easier, particularly in tight spaces or low roof rooms. Be careful of the positioning of your roof box – don’t place it too far to the rear or it could potentially obstruct the tailgate.

Roof-boxes mostly close with Velcro tape or zipper. Some models are accessible by both sides.


Keyhole or Padlock?

Stiff roof-boxes are often locked by keyhole at two points. Flexible models have a padlock.

We advise you choose a keyhole which retains the key. It avoids risks of driving with the roof-box open.


Roof-Box

Roof-Box (320L)

Roof-Box (480L)

Holiday Checklist for Driving in Europe

Compulsory Equipment for Driving in Europe

Many Irish folks are gearing up for their holidays. As always, Europe is proving a popular destination for people, lots of whom will be opting to drive.

But before you hit the road, remember that there are certain compulsory items you are legally obliged to carry in many countries when driving. Some will be obvious (IRL sticker), others less so (breathalyser).

We’ve compiled a list of compulsory items according to the countries below. So, be sure to check the list carefully…and happy holidaying!

IRL Sticker

Headlamp Beam Converters

Warning Triangle

Hi-Vis Jacket

First Aid Kit

NF Approved Breathalyser

Spare Bulbs

holliday checklist

Compulsory Equipment for Driving in Europe


Rejuvenating Your Car (Part 2 – Fluids)

Car DIY - Changing Car Fluids

Last month we looked at ways of rejuvenating your old motor. We discussed ways of superficially sprucing up the car – cleaning tips, interior and exterior styling options, accessorising etc.

This time around however, we’re going to focus on the actual performance of the car and affordable ways of ensuring your vehicle keeps running smoothly.


Flush out your fluids

This is one of the most essential and cost effective ways of protecting your car against break downs and an assortment of mechanical damage. It’s a straight-forward job even for a novice. And the more you do it the easier it becomes.

  1. You can start by consulting your car manual (if you still have it – if you don’t you might want to invest in one HERE). The manual’s, while not essential, at least provide a guide for checking and changing fluids – you can then mark the dates in your calendar to ensure the job gets done wNext hen it needs doing.
  2. Park the car on a flat surface and pull up the handbrake.
  3. Open the car bonnet.
  4. Once the car has cooled down and the oils have drained (give it an hour to be safe) you can check the ENGINE OIL. Pull the Oil Dipstick fully out and wipe clean to ensure a clear reading. Put the dipstick back in and remove once again to read the oil level. The dipstick has a number of marking indicating differing oil levels. If low add an appropriate amount of engine oil.
    1. It’s also worth noting the engine oil colour –Clean = clear / golden, whereas Black / Brown indicates dirty engine oil. UIf the oil is cloudy it might point to contamination (possibly with coolant). This could be down to a blown head gasket in which case you should bring the car to a qualified mechanic.
    2. As a general rule of thumb, it is recommended that you change your engine oil every six months.
    3. If you are going to change your oil (or fluids) an OIL VACUUM PUMP is a handy tool.
  5. Next check the TRANSMISSION OIL, which is responsible for greasing the gear system. It’s part of a closed system so you shouldn’t ever be low on it. You just want to check that it’s clean. You will need to have the engine running. It is the second of the two dipsticks. Follow the same steps you did for checking the engine oil.
    1. FYI: Transmission Oil is reddish in colour and does not need to be replaced as much as engine oil. Brown / Black transmission oil should be replaced.
  6. BRAKE FLUID – Again, like the Transmission Oil, the Brake Fluid is a closed system. Locate the brake master cylinder (it’s generally on the driver’s side of the car by the rear of the engine compartment. It has a plastic reservoir and rubber cap with metal tubes emanating from the cylinder.
    1. Low brake fluid is never a good sign – cars aren’t designed to consume a lot of the stuff – so it could point to a brake line leak, or worn brakes. Low fluid might necessitate a car check-up as a car low on brake fluid might not stop!
  7. POWER STEERING FLUID – The power steering fluid is responsible for keeping your steering smooth. When it starts to run low you may begin to hear a slight groaning noise from the wheel.
    1. Locate the reservoir – you can usually check the level by looking at the reservoir. This fluid does not generally tend to run low, so it levels have dropped significantly then it might be worth checking with your mechanic.
    2. The need to flush and replace is rare, but it doesn’t hurt to keep the level topped up.
  8. COOLANT ANTIFREEZE – Responsible for keeping your car running cool. Low levels of coolant result in the car overheating. It’s located in the car’s radiator.
    1. Remove the radiator cap once the car has cooled down.
    2. You should a line inside that indicates where the coolant should come up to.
    3. Be sure to add the same coolant that’s currently in the car.

fluid-colors