Stop me if you’ve heard this one before…you bring your car in for a service. Something routine enough that you just prefer your mechanic takes care of, like an oil change for example.
The mechanic then informs you that your air filter is in dire need of replacement. Sounds like a straight forward enough job that shouldn’t drive the cost up by any significant amount and won’t keep you waiting. You’re here already, so why not. Two birds, one stone right?
You go to pay and are surprised to find that the cost has doubled as a result of this small job. You say nothing, pay and vow never to just agree to that job on your car without first enquiring about the cost. Fast forward two years and you’re making the same silent vow to yourself all over again.
The thing is, replacing an air filter is amongst the most straight forward maintenance jobs you can do yourself. It requires no specialist tools, the filter itself is not an expensive item, and it is a quick fix. It is also one of the most beneficial maintenance tasks in terms of your car’s performance.
What is your Air Filter?
Air (or more specifically oxygen) is integral if an engine using petrol or diesel is to run. Without it these fuels can’t burn thus depriving the engine of the explosive force needed to power it.
This air must be cleansed before it is fed into the air intake and combustion chambers. Enter the Air Filter – it cleans the air coming into the engine whilst also preventing various forms debris from entering.
Why is it important to regularly change the Air Filter?
Filters can only handle so much. After thousands of miles these filters inevitably show the signs of wear and tear. After all, these filters don’t clean themselves.
A faulty or old filter can result in various forms of dust, debris and dirt clogging up the engine thus hampering its performance and fuel efficiency. By ignoring the Air Filter for a longer period of time you risk serious wear and tear by allowing a build-up of abrasive elements on engine components such as the bearings, cylinders and piston rings.
This in turn can hamper the Air Filters additional task of regulating the ratio of air to fuel in the engine. If the engine is prevented from getting enough clean air, the fuel mix becomes rich putting the engine under more strain.
How often should I change my Air Filter?
There is no one-size-fits-all rule. Some mechanics recommend changing the Air Filter every 3,000 miles / 4,900 km. Others would have you believe the best practice is to be vigilant for the tell-tale signs. Check it regularly yourself and replace as required.
Best practice would be to check the owner’s manual and adhere to its guidelines. In any case, it never hurts to look given how simple a procedure it is. And it could end up saving you from costly repairs further down the line.
What are the symptoms of a dirty Air Filter?
There are a number of tell-tale signs that your Air Filter is in need of replacing.
Poor Performance: A loss of engine power (acceleration etc) can sometimes be attributed to a clogged Air Filter restricting the amount of air into the engine. Jumpy acceleration is another potential indicator of a faulty Air Filter.
Poor Mileage: A decrease in fuel mileage is a common occurrence with regards to dirty filters.
Engine Noises: If the engine makes strange noises when idling (generally these noises tend to be of the spitting / spluttering variety) then you should definitely check the Air Filter.
How do I change my Air Filter?
First things first (and let’s assume you have already committed yourself to replacing the Air Filter), you’ll need to buy a replacement. Which you can do HERE.
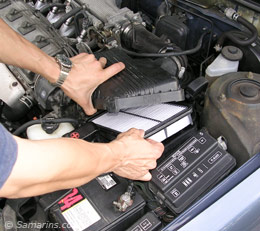
Next, you’ll need to get under the hood to where the Air Filter is located. The Air Filter is contained in a large black plastic housing at the side of the engine. There is usually a big hose protruding from it.
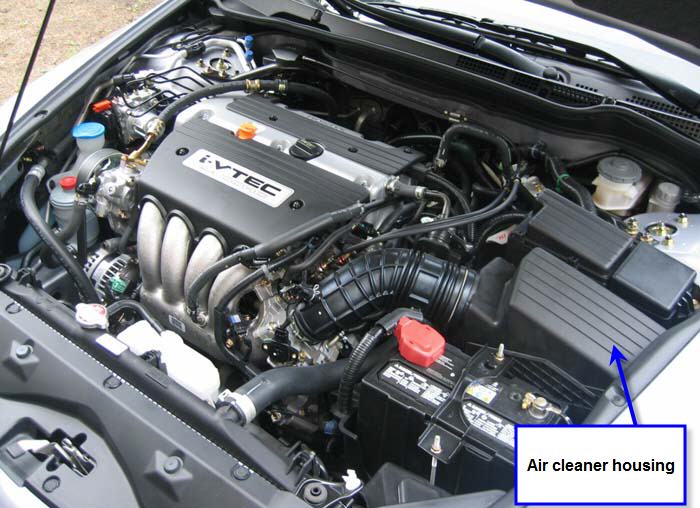
Air Filter Housing
Open this housing and remove the old filter. Now would be a good time to familiarise yourself with it. Check inside its folds for dust and other offending dirty particles.
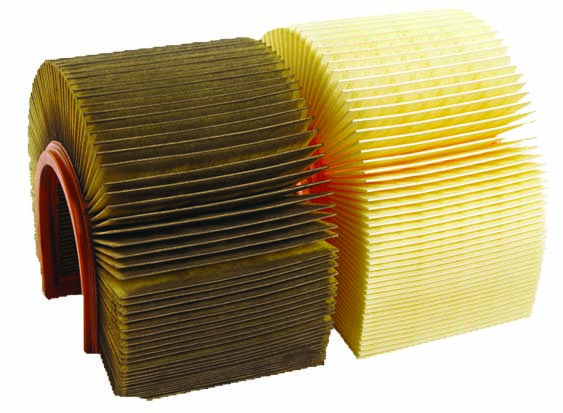
Dirty and Clean Air Filter
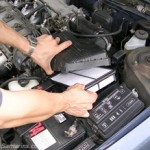
Replace with the new Air Filter. It should fit comfortably in. Close the Housing again.
Replacing Air Filter
And that’s it! Simple.