Archive for Knowledge Base

Rejuvenating Your Car (Part 2 – Fluids)

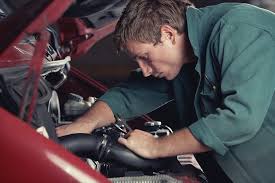
Car DIY - Changing Car Fluids

Last month we looked at ways of rejuvenating your old motor. We discussed ways of superficially sprucing up the car – cleaning tips, interior and exterior styling options, accessorising etc.

This time around however, we’re going to focus on the actual performance of the car and affordable ways of ensuring your vehicle keeps running smoothly.


Flush out your fluids

This is one of the most essential and cost effective ways of protecting your car against break downs and an assortment of mechanical damage. It’s a straight-forward job even for a novice. And the more you do it the easier it becomes.

  1. You can start by consulting your car manual (if you still have it – if you don’t you might want to invest in one HERE). The manual’s, while not essential, at least provide a guide for checking and changing fluids – you can then mark the dates in your calendar to ensure the job gets done wNext hen it needs doing.
  2. Park the car on a flat surface and pull up the handbrake.
  3. Open the car bonnet.
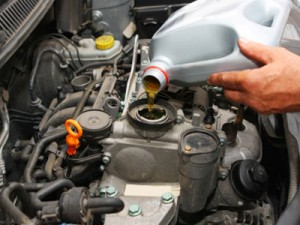
  4. Once the car has cooled down and the oils have drained (give it an hour to be safe) you can check the ENGINE OIL. Pull the Oil Dipstick fully out and wipe clean to ensure a clear reading. Put the dipstick back in and remove once again to read the oil level. The dipstick has a number of marking indicating differing oil levels. If low add an appropriate amount of engine oil.
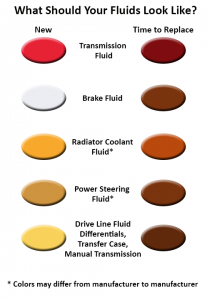
    1. It’s also worth noting the engine oil colour –Clean = clear / golden, whereas Black / Brown indicates dirty engine oil. UIf the oil is cloudy it might point to contamination (possibly with coolant). This could be down to a blown head gasket in which case you should bring the car to a qualified mechanic.
    2. As a general rule of thumb, it is recommended that you change your engine oil every six months.
    3. If you are going to change your oil (or fluids) an OIL VACUUM PUMP is a handy tool.
  5. Next check the TRANSMISSION OIL, which is responsible for greasing the gear system. It’s part of a closed system so you shouldn’t ever be low on it. You just want to check that it’s clean. You will need to have the engine running. It is the second of the two dipsticks. Follow the same steps you did for checking the engine oil.
    1. FYI: Transmission Oil is reddish in colour and does not need to be replaced as much as engine oil. Brown / Black transmission oil should be replaced.
  6. BRAKE FLUID – Again, like the Transmission Oil, the Brake Fluid is a closed system. Locate the brake master cylinder (it’s generally on the driver’s side of the car by the rear of the engine compartment. It has a plastic reservoir and rubber cap with metal tubes emanating from the cylinder.
    1. Low brake fluid is never a good sign – cars aren’t designed to consume a lot of the stuff – so it could point to a brake line leak, or worn brakes. Low fluid might necessitate a car check-up as a car low on brake fluid might not stop!
  7. POWER STEERING FLUID – The power steering fluid is responsible for keeping your steering smooth. When it starts to run low you may begin to hear a slight groaning noise from the wheel.
    1. Locate the reservoir – you can usually check the level by looking at the reservoir. This fluid does not generally tend to run low, so it levels have dropped significantly then it might be worth checking with your mechanic.
    2. The need to flush and replace is rare, but it doesn’t hurt to keep the level topped up.
  8. COOLANT ANTIFREEZE – Responsible for keeping your car running cool. Low levels of coolant result in the car overheating. It’s located in the car’s radiator.
    1. Remove the radiator cap once the car has cooled down.
    2. You should a line inside that indicates where the coolant should come up to.
    3. Be sure to add the same coolant that’s currently in the car.

fluid-colors

Make Your Headlamp Shine Like New!

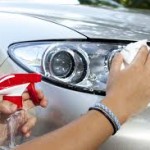
Headlight

Here on the Motorparts.ie blog we recently looked at ways of ‘winter-proofing’ your car. We touched upon the importance of replacing fading or burnt out bulbs, as well as regularly removing grime from the lenses.

We’re going to look at this aspect in more detail this time around, because even though we’re beginning to see more of a stretch in the evening, having your headlamps in showroom condition makes a huge difference when driving at night.

It’s a straight forward and affordable process that won’t take up much time, but one which will make driving at night all the more easy (and safe). It’s also a potentially huge money-saver – because you cannot simply replace the plastic on sealed headlamp units. If your car happens to be an expensive vehicle with high-performance lights then replacing this unit can cost hundreds of euros.

However, with a few cheaply bought tools and products, and some all-important know-how, you can get your headlamps looking as good as new in under an hour for considerably less.


Preparation:

Start by washing away whatever grime and dirt may have built up on the surface of your headlamps. For a seriously deep clean consider using a rich gel formula such as Meguiars Plast-RX.

The non-toxic formula effortlessly removes scratches, stains, cloudiness and oxidation.  If you’re working on a tight budget then washing with warm, soapy water should suffice.

There are a number of things to look out for once the surface has been cleaned. Hazing, yellowing and cracks are all tell-tale signs of wear and tear, and all can have detrimental effects on the effectiveness of your headlamp performance depending on how far along they are.

Hazing and yellowing starts once the hardcoat is worn down. The surface subsequently absorbs more light (yellowing) and scratches (hazing). In terms of hazing, a cheap clean might do for reversing the effects.

However, if the headlamps have a noticeable yellowish crust you will almost certainly require a more comprehensive treatment with professional products (such as Plast-RX or Meguiars Head Lamp Restoration Kit). Cracks on the lens will require professional resurfacing.

Tip: NEVER use household glass cleaning products on your headlamps. These products have ammonia in them which causes plastic to turn yellow.


Sanding:

Time to get abrasive. Sandpaper is used to wear away the layer of haze and/or yellowing that has built up on the surface.

Have a few different coarse grades of sandpaper to hand. It’s generally advised to stick to finer (i.e. less coarse) grades for finishing, with one coarser grade to begin the cleaning with.

You will be looking for an even, dull finish when using the coarser sandpaper. Then, switch to the finer sandpaper and continue the process until the dullness gives way to more clarity.

Tip: There’s an obvious danger of scratching the surrounding paint when sanding the headlamps. Stick some tape around the edges of the headlamp.


Polishing:

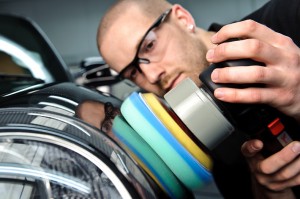
There’s a few options available to you when it comes to the polishing process. On the one hand you have a variety of different headlamp-specific buffing compounds (including the aforementioned Meguiars).

Use a microfibre mitt (such as the Kent’s Microfibre Cleaning Kit) to apply the buffing compound. Work in a circular motion. It may take up to three buffing coats to get the finish you desire.

If money is an issue there may be a number of household products that will do a temporary job. Bath tub and sink cleaners sometimes are effective given that they are manufactured for plastic – just ensure they’re non-abrasive. Toothpaste is another oft-quoted life-hack when it comes to cleaning headlamps. Avoid products with whitening agents, peroxide and additives. Blue toothpaste is said to be the best fit for this purpose.

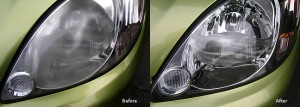
Before After

Buying a Second Hand Car Checklist

buying a car checklist

Following on from our recent blog and the theme of buying second hand parts, we’ve decided to put together a check-list of important points to consider when buying a used car.

Checking the Car’s Exterior

Is the car on level ground? This is important in order to allow you to properly check the tyres and any sagging issues there may be.

Inspect the paint job: Make sure you give the cars paint job a thorough going-over. Is Rust spots, dents and scratches are obviously undesirable, and in the case of rust spots could later lead to further issues. Roughness and / or unevenness is a potential indicator of previous use of masking tape or a poorly executed paint job to mask over these blemishes.

Boot-iful: What condition is the boot in? Tread carefully where there is evidence of rust or leakage.

Tyre Check: Tyres on a used vehicle should ideally be matched and evenly worn. Uneven wear can sometimes be attributed to knackered steering and suspension parts. Always worth checking the spare tyre too to ensure that it’s a full spare and not a cheap filler that will serve little to no purpose.

You’ve been framed: This one can sometimes be difficult to spot, but it’s definitely one of the most important things on this checklist as the frame is an integral safety feature. Collisions with faulty frames are particularly dangerous. Look out for clamp marks (i.e. holes or gashes) as a sing of previous damage. Uneven paint jobs (i.e. paint on rear / front headlamps) may also give away a vehicles bumpy history (pun intended). Remember, the gaps between body panels should always be of a consistent width. Door’s, boots or hoods that don’t close and seal properly is strong evidence that the vehicle has been involved in a series accident.

Get down and dirty: If possible try and inspect underneath the car (preferably with it safely raised). Check for black spots or rust on the exhaust system as both indicate leaking. Rub your fingers along the exhaust – if you find greasy grime you’ve got a problem. Get the car running too and check for white vapour. If it’s emitted in warm conditions there’s issues.

Under the Hood

Check for damage: Dents? Rust? Beware! Look for the VIN (vehicle identification number) where the hood joins the fender. No sigh of it? That’s a tell-tale sign that the fender has been replaced.

Hoses and Belts: Important to inspect all hoses and belts for cracks. Radiator hoses should be neither soft nor sticky. Hoses with noticeable swelling where connected to the radiator or engine will need immediate replacing. Might as well check for leaks around hose clamps while you are there.

Engine Check: Here you should have your eyes peeled for evidence of leaks, stains and corrosion. Any evidence of these could be indicative of a gasket leak, which could potentially lead to some very expensive repair costs further down the line. All engine belts should look as good as new. Replacing old belts which can easily snap can prove costly.

Filler Cap: Does the oil filler cap have a foamy residue inside it? If so then you could be forced to deal with a faulty / leaking head gasket. And if that is the case then you might be best of holding onto your money. What sort of condition is the overflow jar in? If you find grimy brown coolant than its possible that it’s never been flushed or, again, there is a leaky gasket at play.

Dipstick: Always worth checking the transmission fluid. Pull the dipstick out and inspect the fluid. It should ideally be pink or light red. If dark (and this is sometimes the case with older cars), it should never look or smell burnt. Best to do this check with the engine on!

Timing Belt: The timing belt is the most important belt in a car’s engine, and therefore the most expensive to replace. CHECK IT!

What about inside the car?

Keeping Up(holstery) Appearances: Pretty obvious, and easy to spot – rips, stains, tears, all undesirable scuff marks.

Air Conditioning: OK, so here in Ireland the air-con might not get nearly as much use as we’d all like, but you should still make sure it’s working perfectly.

Mileage: This one really goes without saying. Check the odometer. And if there is any lingering doubt, make sure to have the seller put in writing a confirmation of the correct mileage.

Lights Out: How does the car function when it’s not moving? Parking sensors etc should always be given the once over.

Test Drive

Brakes: This one is really stating the obvious, but the best way to learn about any car is to take it for a test drive. And one of the most important things to check is the brakes. Press down firmly to decelerate hard in order to accurately judge the state of the brakes (30mph is a good speed to try this test). There should be no vibrations from the brake pedal. Also keep an ear out for noises such as squealing. If the brakes are throbbing you may be looking at having to replace the rotors or pads. There should be no swerving. If it is swerving then the brake calipers or steering components could be worn.

Why Oil Changes are Important

lifetime engine oil

What is an oil change?

The engine in your car works hard. Or more specifically the components that make up the engine work hard. There’s an awful lot of grinding, friction and heat going on under that hood. Your engine oil is the lubricant that keeps subsequent wear and tear in check. But, if left for too long without changing, that oil starts to accumulate dirt, grit and gunk, which in turn increases the effects of the wear and tear. Think of the engine and oil change as a sick patient getting a blood transfusion.

Why is it important?

Thermal Breakdown: Car engines function at very high temperatures which in turn can frequently cause oil to go through what’s called a ‘Thermal Breakdown’. This chemical reaction basically amounts to a serious degradation of the engine oil. This in turn affects the oils ability to flow smoothly and properly coat the engines components. The subsequent friction severely shortens the lifespan of an engine.

Engine Gunk: Engine combustion inevitably leads to your car’s engine collecting a substantial build-up of carbon deposits. This gunk, which collects on the pistons, cylinders and valves, eventually hardens and, if left unattended, can limit the amount of air and fuel the valves let in. This can lead to less efficient burning of fuel and possible overheating, which in turn leads to oil stress.

Corrosion: Aside from gunk, engine oil also collects water, dust and dirt. This debris gradually corrodes engine components if not removed. Fresh oil helps flush out these unwanted fragments.

Congested Filters: Changing the oil should always be accompanied by a changing of the filter too. Filters serve an important purpose – preventing sludge from getting to the engine. Failure to change the filters regularly leads to an unhealthy congestion of particles such as dirt, degraded oil and combustion sludge. That means less good quality oil makes its way to your engine. And the less oil your engine receives the worse of your engine will be. “

Leaks: From time to time gas or coolant can leak into oil, contaminating it in the process and eventually damaging the engine. There is no way to know whether this is happening short of having the oil changed.

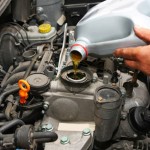
car oil change

Money Saver:

This is the most important thing that you will do to ensure your engine lasts the distance. Regular oil changes are recommended every 3 months or 3000 miles (whichever comes first) so learning how to do it yourself will not only save you money in the here and now, it will also prevent further more expensive costs occurring further down the line.

How do I change my car’s oil?

Drain the Oil: Lift the car, and let it heat up. This will get the oil warm and churned, which in turn will help it drain more easily. If the engine is hot, let it cool down for AT LEAST 30 minutes. Remove the oil plug underneath the car (it’s a large bolt on the oil pans bottom). A complete drain usually takes about two minutes.

Remove and replace the Oil Filter: The easiest way to locate the oil filter is to look at your new filter and search for a similar part. Before removing the filter make sure you have your bucket / oil pan positioned below. Ensure the rubber gasket ring comes off too, otherwise your new filter won’t get a sufficient seal on the engine. Smear some new oil on the gasket ring of the new filter and thread it on. Make sure it’s tight.

Adding New Oil: Refill the engine using a funnel and recap the bottle before you toss it into the recycling bin. Check with a dipstick if you’re not sure if you have put enough in. Once satisfied, screw the cap back on tight.

Run the engine: Start the car and run the engine for 5 minutes. This brings the engines oil pressure levels back to where they need to be, while also allowing you to check if there are any leaks by the oil plug and filter. If there are leaks or spots, clean them, and tighten the plug as needed.

lifetime engine oil

When changing my car oil, what do I need?

How to Polish Your Car like a Pro

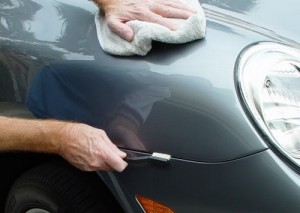
polishing your car

It’s a universal truth, an occurrence as routine as the sun rising in the morning and setting in the evening. And sure enough, as night follows day, your newly bought car will lose a substantial amount of value as soon as she is driven from the lot.

But just because your motor has depreciated in value doesn’t mean its shiny exterior needs to depreciate also. It’s possible – even when it’s not a new motor, to give your vehicle a gleaming finish. And we’re not talking about forking out an entire paycheck on equipment or a professional shop-job.

Wheeling – Car Polish Technique

‘Wheeling’ is a process of heating the paint’s clear coat with a rotating wheel until it reduces down to a sticky liquid that fills in and dispels blemishes.

To avoid lasting damage to the paint, you should only utilize this method once a year and wax your car every couple of months. Here’s how you get a perfect finish:

polishing your car

(1) Start by washing your car by hand in a shaded area. Rinse the vehicle thoroughly but do not dry it.

Technique Tip: Wheeling is a messy process, so cover items (such as other cars, pets, and nearby walls) that you don’t want to clean afterward. Use softer pads and polishing compounds on dark-colored cars, as they are especially sensitive to swirl marks. More-aggressive compounds and pads can be used on lighter hues.

(2) Place a clean, slightly damp pad on the polishing wheel and put a moderate amount of compound on one body panel. Spread the polish with the wheel, using a medium speed. The key is to keep the spinning pad parallel to the car’s surface to avoid swirl marks. Apply constant pressure and work back and forth over the entire surface of the panel. As the clear coat heats up and the paint becomes warm to the touch, scratches will begin to disappear. When the compound and water are thrown aside and absorbed by the foam pad, the brightened finish will become visible. Stop. Move to the next panel and repeat.

Technique Tip: Keep the area wet and use just enough polish for each panel.

(3) As necessary, stop and rinse off the foam pad with a hose or a power washer to prevent it from becoming saturated or gummed up with compound.

Technique Tip: The outer edge of the pad moves faster, generating more friction than the center, and it usually carries less polish—a recipe for a burned finish. So be especially careful around intricate trim areas, such as washer nozzles, mirrors, emblems, and complex bumper contours that can be polished using only the outer edge of the pad.

(4) Wash and rinse the car again by hand when finished, including the door, trunk, and hood jambs. Dry thoroughly

(5) Applying a coat of wax to the paint will help mask swirl marks and cover up most remaining surface imperfections. Mount a soft foam pad on an orbital sander and apply an approximate 60:40 mix of paste wax and a fine finishing polish onto the pad. Use the sander at a medium speed to spread the wax onto the vehicle in a back-and-forth motion and with light but steady pressure. Leave just enough of a waxy haze to be visible when dry.
waxing your car
(6) While the wax is drying, clean the other areas of the car (windows, interior, etc.) and then remove the wax with a microfiber towel—bath towels or rags may mar the surface. Apply touch-up paint to chips and any lingering scratches as needed. Move the car into sunlight for a final inspection. Crack a cold one and enjoy.
Note: Polish process is for modern, multistage clear-coat finishes only.


Required tools (suggested brand)